Table of Contents
Introduction :
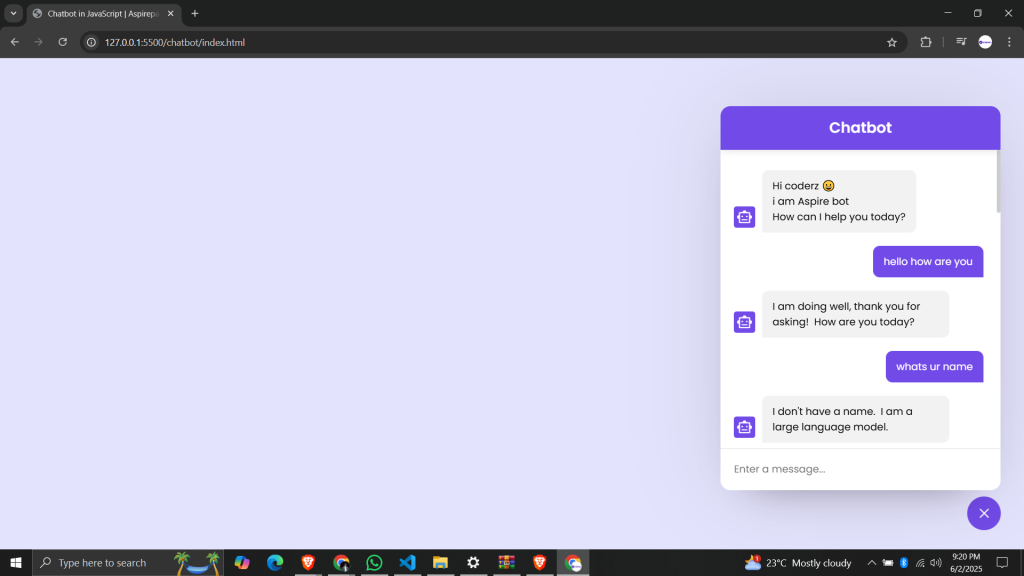
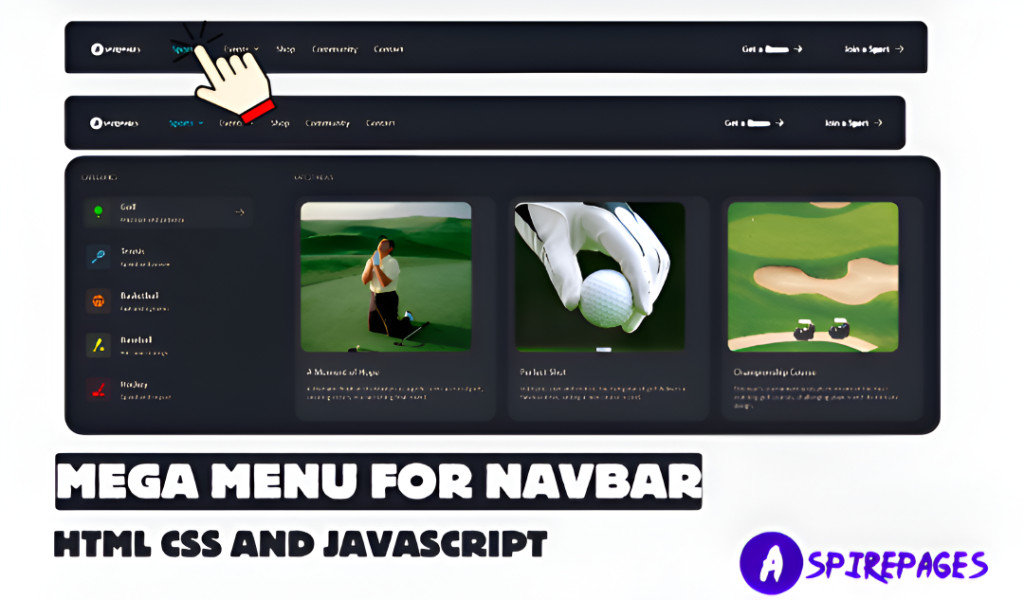
Creating a Responsive AI Chatbot Template that looks great on both desktop and mobile might sound complex — but what if you could build one in just 5 minutes using only HTML, CSS, and JavaScript? 🤯
Whether you’re a beginner developer or a student looking to build your portfolio, this project gives you a professional-looking chatbot UI that can easily be integrated into any frontend app, including React.
In this beginner-friendly guide, we’ll walk through every step using HTML, CSS, and JavaScript to build a fully working, real-world component. You’ll get:
📦 Full copy-paste-ready source code
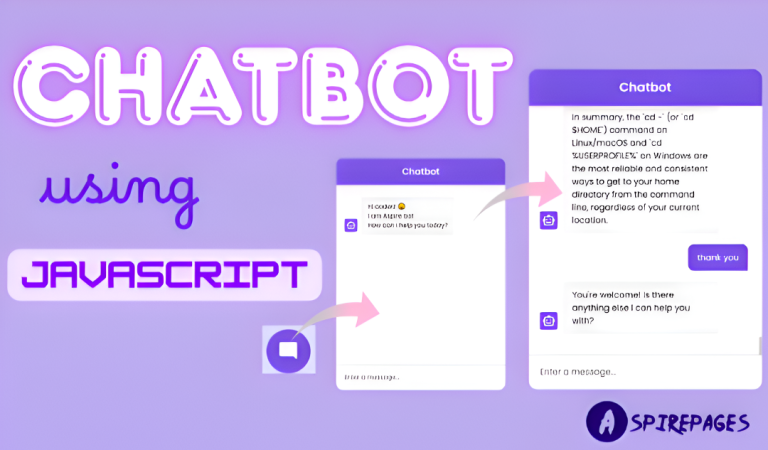
💬 A real chatbot interface with smart responses
📱 A fully responsive UI
📘 A complete Chatbot Project Setup Guide
Whether you’re building a portfolio or learning UI/UX patterns, this Responsive AI Chatbot Template is a must-have for your toolkit.
Setup and Requirements For Responsive AI Chatbot Template:
Before we begin, ensure you have the following:
✅ Requirements:
- A code editor like Visual Studio Code
- Basic knowledge of HTML, CSS, and JavaScript
- A modern web browser (Chrome, Firefox, Edge)
- No additional libraries or frameworks needed
⏱️ Time Required: Under 5 minutes to build!
📂 Folder Structure:
Create a project folder and set up the following files:
Responsive AI Chatbot Template/
│── index.html  (HTML structure)
│── index.css  (CSS for styling)
│── script.js   ( needed)
Now, let’s dive into building the Responsive AI Chatbot Template step by step!
Chatbot Project Setup Guide :
If you encounter an error like
“API key not valid. Please pass a valid API key.”
while chatting with the chatbot, follow these steps:
✅ Get Your API Key
- Go to Google AI Studio.
- Navigate to the API key section and create a new API key.
Example API Key:
AIzaSyAtpnKGX13bTgmx0l_gQeatYvdWvY_wOlQ
📌 Note: This API is free, but limited in usage requests per day.
🔑 Insert Your API Key
- Open your project folder in VS Code.
- Open the
script.jsfile. - Find the line that looks like this:
const API_KEY = "PASTE-YOUR-API-KEY";
- Replace
"PASTE-YOUR-API-KEY"with your actual API key.
Save and Test
- Save
script.js. - Open
index.htmlin your browser. - Test if the chatbot is responding properly.
🧠 Important Info: Gemini Models
This chatbot uses Google’s Gemini 1.5 Flash (beta) model by default:
- 🔄 Faster responses
- 🔓 More free requests
You can switch to a stable version (gemini-1.5-pro) for higher reliability:
✅ To use gemini-1.5-pro, update this line in script.js:
const API_URL = `https://generativelanguage.googleapis.com/v1/models/gemini-1.5-pro:generateContent?key=${API_KEY}`;Project Overview:
This project is Responsive AI Chatbot Template built entirely with HTML, CSS, and JavaScript. Here’s what it includes:
✅ Mobile-friendly
✅ Easy to integrate anywhere
✅ Cleanly designed using flexbox
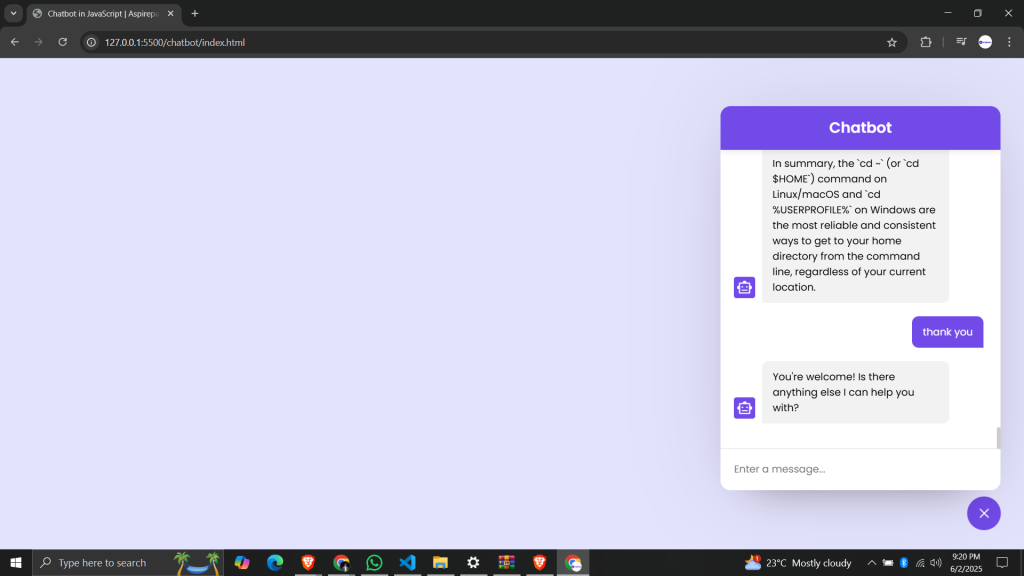
✅ Powered by a Gemini (Google AI) model (or static replies for offline use)
🌟 Features:
📱 Fully responsive for all devices
💬 Smart conversation layout
🧠 Gemini AI model (gemini-1.5-flash by default)
🔧 Works offline with hardcoded responses (optional)
💾 Can be upgraded to store chat history
🔌 Gemini API integration (free)
Whether you’re practicing JavaScript , this ai chatbot is sleek, simple, and scalable for real projects like Responsive AI Chatbot Template.
This project is perfect for beginners to practice layout techniques, responsive design, and JavaScript event handling.
Step 1: HTML For Responsive AI Chatbot Template:
HTML Code Responsive AI Chatbot Template
<!DOCTYPE html>
<html lang="en" dir="ltr">
  <head>
    <meta charset="utf-8" />
    <title>Chatbot in JavaScript | Aspirepages</title>
    <link rel="stylesheet" href="style.css" />
    <meta name="viewport" content="width=device-width, initial-scale=1.0" />
    <!-- Google Fonts Link For Icons -->
    <link rel="stylesheet" href="https://fonts.googleapis.com/css2?family=Material+Symbols+Outlined:opsz,wght,FILL,GRAD@48,400,0,0" />
    <link rel="stylesheet" href="https://fonts.googleapis.com/css2?family=Material+Symbols+Rounded:opsz,wght,FILL,GRAD@48,400,1,0" />
    <script src="script.js" defer></script>
  </head>
  <body>
    <button class="chatbot-toggler">
      <span class="material-symbols-rounded">mode_comment</span>
      <span class="material-symbols-outlined">close</span>
    </button>
    <div class="chatbot">
      <header>
        <h2>Chatbot</h2>
        <span class="close-btn material-symbols-outlined">close</span>
      </header>
      <ul class="chatbox">
        <li class="chat incoming">
          <span class="material-symbols-outlined">smart_toy</span>
          <p>Hi coderz 😀<br>i am Aspire bot <br />How can I help you today?</p>
        </li>
      </ul>
      <div class="chat-input">
        <textarea placeholder="Enter a message..." spellcheck="false" required></textarea>
        <span id="send-btn" class="material-symbols-rounded">send</span>
      </div>
    </div>
  </body>
</html>
HTML Explanation For Responsive AI Chatbot Template:
<!DOCTYPE html>
Declares the document as HTML5, ensuring modern browser compatibility.
<html lang=”en” dir=”ltr”>
Starts the HTML structure, sets language to English and text direction to left-to-right.
<head>
Contains metadata, links to stylesheets, fonts, and the main script that powers the chatbot.
<meta charset=”utf-8″ />
Ensures proper character encoding for displaying text and symbols.
<title>Chatbot in JavaScript | Aspirepages</title>
Sets the page title shown in the browser tab.
<link rel=”stylesheet” href=”style.css” />
Links the external CSS file to style the chatbot UI.
<meta name=”viewport” content=”width=device-width, initial-scale=1.0″ />
Makes the layout responsive across all device screen sizes.
Google Fonts Links
Imports icon fonts used in the UI, such as chat, close, and send icons.
<script src=”script.js” defer></script>
Loads the JavaScript file that controls chatbot logic and interactions, after HTML loads.
<button class=”chatbot-toggler”>
A toggle button to open or close the chatbot interface.
<span> Icons Inside Toggle Button
Shows “chat” icon when closed and “close” icon when opened.
<div class=”chatbot”>
Main container for the chatbot interface including header, messages, and input.
<header>
Top section of the chatbot with the title and a close button.
<ul class=”chatbox”>
Displays chat messages between the bot and user as a list.
<li class=”chat incoming”>
An example of a bot message styled as incoming, including an icon and greeting text.
<div class=”chat-input”>
Holds the input area where users can type their messages.
<textarea>
Input box for user messages, with placeholder text and no spellcheck.
<span id=”send-btn”>
A send icon the user clicks to submit a message.
Step 2 : CSS For Responsive AI Chatbot Template:
CSS Code For Responsive AI Chatbot Template
/* Import Google font - Poppins */
@import url('https://fonts.googleapis.com/css2?family=Poppins:wght@400;500;600&display=swap');

* {
  margin: 0;
  padding: 0;
  box-sizing: border-box;
  font-family: "Poppins", sans-serif;
}

body {
  background: #e4e3fd;
}

.chatbot-toggler {
  position: fixed;
  bottom: 30px;
  right: 35px;
  outline: none;
  border: none;
  height: 50px;
  width: 50px;
  display: flex;
  cursor: pointer;
  align-items: center;
  justify-content: center;
  border-radius: 50%;
  background: #724ae8;
  transition: all 0.2s ease;
}

body.show-chatbot .chatbot-toggler {
  transform: rotate(90deg);
}

.chatbot-toggler span {
  color: #fff;
  position: absolute;
}

.chatbot-toggler span:last-child,
body.show-chatbot .chatbot-toggler span:first-child {
  opacity: 0;
}

body.show-chatbot .chatbot-toggler span:last-child {
  opacity: 1;
}

.chatbot {
  position: fixed;
  right: 35px;
  bottom: 90px;
  width: 420px;
  background: #fff;
  border-radius: 15px;
  overflow: hidden;
  opacity: 0;
  pointer-events: none;
  transform: scale(0.5);
  transform-origin: bottom right;
  box-shadow: 0 0 128px 0 rgba(0, 0, 0, 0.1),
    0 32px 64px -48px rgba(0, 0, 0, 0.5);
  transition: all 0.1s ease;
}

body.show-chatbot .chatbot {
  opacity: 1;
  pointer-events: auto;
  transform: scale(1);
}

.chatbot header {
  padding: 16px 0;
  position: relative;
  text-align: center;
  color: #fff;
  background: #724ae8;
  box-shadow: 0 2px 10px rgba(0, 0, 0, 0.1);
}

.chatbot header span {
  position: absolute;
  right: 15px;
  top: 50%;
  display: none;
  cursor: pointer;
  transform: translateY(-50%);
}

header h2 {
  font-size: 1.4rem;
}

.chatbot .chatbox {
  overflow-y: auto;
  height: 510px;
  padding: 30px 20px 100px;
}

.chatbot :where(.chatbox, textarea)::-webkit-scrollbar {
  width: 6px;
}

.chatbot :where(.chatbox, textarea)::-webkit-scrollbar-track {
  background: #fff;
  border-radius: 25px;
}

.chatbot :where(.chatbox, textarea)::-webkit-scrollbar-thumb {
  background: #ccc;
  border-radius: 25px;
}

.chatbox .chat {
  display: flex;
  list-style: none;
}

.chatbox .outgoing {
  margin: 20px 0;
  justify-content: flex-end;
}

.chatbox .incoming span {
  width: 32px;
  height: 32px;
  color: #fff;
  cursor: default;
  text-align: center;
  line-height: 32px;
  align-self: flex-end;
  background: #724ae8;
  border-radius: 4px;
  margin: 0 10px 7px 0;
}

.chatbox .chat p {
  white-space: pre-wrap;
  padding: 12px 16px;
  border-radius: 10px 10px 0 10px;
  max-width: 75%;
  color: #fff;
  font-size: 0.95rem;
  background: #724ae8;
}

.chatbox .incoming p {
  border-radius: 10px 10px 10px 0;
}

.chatbox .chat p.error {
  color: #721c24;
  background: #f8d7da;
}

.chatbox .incoming p {
  color: #000;
  background: #f2f2f2;
}

.chatbot .chat-input {
  display: flex;
  gap: 5px;
  position: absolute;
  bottom: 0;
  width: 100%;
  background: #fff;
  padding: 3px 20px;
  border-top: 1px solid #ddd;
}

.chat-input textarea {
  height: 55px;
  width: 100%;
  border: none;
  outline: none;
  resize: none;
  max-height: 180px;
  padding: 15px 15px 15px 0;
  font-size: 0.95rem;
}

.chat-input span {
  align-self: flex-end;
  color: #724ae8;
  cursor: pointer;
  height: 55px;
  display: flex;
  align-items: center;
  visibility: hidden;
  font-size: 1.35rem;
}

.chat-input textarea:valid~span {
  visibility: visible;
}

@media (max-width: 490px) {
  .chatbot-toggler {
    right: 20px;
    bottom: 20px;
  }

  .chatbot {
    right: 0;
    bottom: 0;
    height: 100%;
    border-radius: 0;
    width: 100%;
  }

  .chatbot .chatbox {
    height: 90%;
    padding: 25px 15px 100px;
  }

  .chatbot .chat-input {
    padding: 5px 15px;
  }

  .chatbot header span {
    display: block;
  }
}
CSS Explanation For Responsive AI Chatbot Template
@import Google Font – Poppins
Loads the “Poppins” font from Google Fonts to apply a clean, modern typeface.
* Universal Selector
Removes default margin/padding, sets box-sizing: border-box, and applies the “Poppins” font globally for consistent styling.
body
Applies a soft lavender background for a clean and minimal UI base.
.chatbot-toggler
Floating button positioned at the bottom-right. Circular design with a purple background, used to open/close the chatbot.
body.show-chatbot .chatbot-toggler
Rotates the toggle button 90 degrees when chatbot is open.
.chatbot-toggler span
Hides/shows the correct icon depending on chatbot’s open/close state.
.chatbot
Main chatbot container. Fixed position with white background, rounded corners, and smooth scaling + fade-in animation on open.
body.show-chatbot .chatbot
Activates the chatbot with full opacity and pointer access, scaling it into view.
.chatbot header
Purple header with white text, centered title, and slight shadow for elevation.
.chatbot header span
Close icon positioned to top-right, hidden on desktop but visible on mobile.
header h2
Sets the chatbot title size to 1.4rem for visibility.
.chatbot .chatbox
Scrollable message area with padding and fixed height. Handles message overflow vertically.
Scrollbar Styling
Thin, rounded scrollbars with subtle color styling for a clean look.
.chatbox .chat
Defines each chat message layout using flexbox.
.outgoing and .incoming
Aligns messages to the right (user) or left (bot). Adds spacing and color coding.
.incoming span
Bot icon styling — small, circular, purple background with white text.
.chatbox .chat p
Message bubble styling: padding, rounded corners, limited width, and background color. Bot and user messages are visually distinct.
.chat p.error
Applies red-themed styling for error messages.
.chatbot .chat-input
Sticky input area at the bottom. Uses flex layout and includes textarea + send icon.
.chat-input textarea
No border/resize. Auto-expanding up to 180px. Clean and minimal input box.
.chat-input span
Send icon, hidden by default. Becomes visible when textarea has valid input.
Responsive Design (@media)
Adjusts chatbot layout on smaller screens:
- Toggler and chatbot shift position
- Chatbot expands to full screen
- Input and chat spacing adapt for mobile
- Close button becomes visible
Step 3 : JavaScript For Responsive AI Chatbot Template :
JavaScript Code For Responsive AI Chatbot Template
const chatbotToggler = document.querySelector(".chatbot-toggler");
const closeBtn = document.querySelector(".close-btn");
const chatbox = document.querySelector(".chatbox");
const chatInput = document.querySelector(".chat-input textarea");
const sendChatBtn = document.querySelector(".chat-input span");

let userMessage = null; // Variable to store user's message
const inputInitHeight = chatInput.scrollHeight;

// API configuration
const API_KEY = "Your API key here"; // Your API key here
const API_URL = `https://generativelanguage.googleapis.com/v1beta/models/gemini-1.5-flash:generateContent?key=${API_KEY}`;

const createChatLi = (message, className) => {
  // Create a chat <li> element with passed message and className
  const chatLi = document.createElement("li");
  chatLi.classList.add("chat", `${className}`);
  let chatContent = className === "outgoing" ? `<p></p>` : `<span class="material-symbols-outlined">smart_toy</span><p></p>`;
  chatLi.innerHTML = chatContent;
  chatLi.querySelector("p").textContent = message;
  return chatLi; // return chat <li> element
};

const generateResponse = async (chatElement) => {
  const messageElement = chatElement.querySelector("p");

  // Define the properties and message for the API request
  const requestOptions = {
    method: "POST",
    headers: { "Content-Type": "application/json" },
    body: JSON.stringify({
      contents: [
        {
          role: "user",
          parts: [{ text: userMessage }],
        },
      ],
    }),
  };

  // Send POST request to API, get response and set the reponse as paragraph text
  try {
    const response = await fetch(API_URL, requestOptions);
    const data = await response.json();
    if (!response.ok) throw new Error(data.error.message);

    // Get the API response text and update the message element
    messageElement.textContent = data.candidates[0].content.parts[0].text.replace(/\*\*(.*?)\*\*/g, "$1");
  } catch (error) {
    // Handle error
    messageElement.classList.add("error");
    messageElement.textContent = error.message;
  } finally {
    chatbox.scrollTo(0, chatbox.scrollHeight);
  }
};

const handleChat = () => {
  userMessage = chatInput.value.trim(); // Get user entered message and remove extra whitespace
  if (!userMessage) return;

  // Clear the input textarea and set its height to default
  chatInput.value = "";
  chatInput.style.height = `${inputInitHeight}px`;

  // Append the user's message to the chatbox
  chatbox.appendChild(createChatLi(userMessage, "outgoing"));
  chatbox.scrollTo(0, chatbox.scrollHeight);

  setTimeout(() => {
    // Display "Thinking..." message while waiting for the response
    const incomingChatLi = createChatLi("Thinking...", "incoming");
    chatbox.appendChild(incomingChatLi);
    chatbox.scrollTo(0, chatbox.scrollHeight);
    generateResponse(incomingChatLi);
  }, 600);
};

chatInput.addEventListener("input", () => {
  // Adjust the height of the input textarea based on its content
  chatInput.style.height = `${inputInitHeight}px`;
  chatInput.style.height = `${chatInput.scrollHeight}px`;
});

chatInput.addEventListener("keydown", (e) => {
  // If Enter key is pressed without Shift key and the window
  // width is greater than 800px, handle the chat
  if (e.key === "Enter" && !e.shiftKey && window.innerWidth > 800) {
    e.preventDefault();
    handleChat();
  }
});

sendChatBtn.addEventListener("click", handleChat);
closeBtn.addEventListener("click", () => document.body.classList.remove("show-chatbot"));
chatbotToggler.addEventListener("click", () => document.body.classList.toggle("show-chatbot"));
JavaScript Explantion For File Uploader with Progress Bar
1. Selecting HTML Elements
jsCopyEditconst chatbotToggler = document.querySelector(".chatbot-toggler");
const closeBtn = document.querySelector(".close-btn");
const chatbox = document.querySelector(".chatbox");
const chatInput = document.querySelector(".chat-input textarea");
const sendChatBtn = document.querySelector(".chat-input span");
- These lines grab elements from the HTML so we can interact with them using JavaScript (e.g., toggling the chatbot, typing, sending messages).
💬 2. Initial Setup
let userMessage = null;
const inputInitHeight = chatInput.scrollHeight;
userMessagewill temporarily store the message the user types.inputInitHeightremembers the original height of the text box (for resizing later).
🔐 3. API Configuration
const API_KEY = "Your API key here";
const API_URL = `https://generativelanguage.googleapis.com/v1beta/models/gemini-1.5-flash:generateContent?key=${API_KEY}`;
- This is the Google Gemini API URL, using your provided
API_KEY.
🧱 4. Create a Chat Bubble
const createChatLi = (message, className) => {
  const chatLi = document.createElement("li");
  chatLi.classList.add("chat", `${className}`);
  let chatContent = className === "outgoing" ? `<p></p>` : `<span class="material-symbols-outlined">smart_toy</span><p></p>`;
  chatLi.innerHTML = chatContent;
  chatLi.querySelector("p").textContent = message;
  return chatLi;
};
- This function creates a
<li>for the chat message. - If it’s the user (outgoing), it just shows text.
- If it’s the bot (incoming), it adds a robot icon.
🤖 5. Get Bot Response from Gemini API
const generateResponse = async (chatElement) => {
  const messageElement = chatElement.querySelector("p");

  const requestOptions = {
    method: "POST",
    headers: { "Content-Type": "application/json" },
    body: JSON.stringify({
      contents: [{ role: "user", parts: [{ text: userMessage }] }],
    }),
  };

  try {
    const response = await fetch(API_URL, requestOptions);
    const data = await response.json();
    if (!response.ok) throw new Error(data.error.message);

    messageElement.textContent = data.candidates[0].content.parts[0].text.replace(/\*\*(.*?)\*\*/g, "$1");
  } catch (error) {
    messageElement.classList.add("error");
    messageElement.textContent = error.message;
  } finally {
    chatbox.scrollTo(0, chatbox.scrollHeight);
  }
};
- Sends a
POSTrequest to Gemini with the user’s message. - On success, updates the bot’s reply in the UI.
- Catches and shows any errors in a red bubble.
📝 6. Handle Sending Message
const handleChat = () => {
  userMessage = chatInput.value.trim();
  if (!userMessage) return;

  chatInput.value = "";
  chatInput.style.height = `${inputInitHeight}px`;

  chatbox.appendChild(createChatLi(userMessage, "outgoing"));
  chatbox.scrollTo(0, chatbox.scrollHeight);

  setTimeout(() => {
    const incomingChatLi = createChatLi("Thinking...", "incoming");
    chatbox.appendChild(incomingChatLi);
    chatbox.scrollTo(0, chatbox.scrollHeight);
    generateResponse(incomingChatLi);
  }, 600);
};
- Reads and sends user input.
- Adds the user’s message immediately.
- Shows a “Thinking…” bot message while waiting for a response.
🔁 7. Resize Text Area Automatically
chatInput.addEventListener("input", () => {
  chatInput.style.height = `${inputInitHeight}px`;
  chatInput.style.height = `${chatInput.scrollHeight}px`;
});
- As the user types, the text box grows to fit the content.
⌨️ 8. Send on Enter (for desktop)
chatInput.addEventListener("keydown", (e) => {
  if (e.key === "Enter" && !e.shiftKey && window.innerWidth > 800) {
    e.preventDefault();
    handleChat();
  }
});
- Pressing Enter (without Shift) sends the message — but only on wide screens.
🖱️ 9. Button Click Events
sendChatBtn.addEventListener("click", handleChat);
closeBtn.addEventListener("click", () => document.body.classList.remove("show-chatbot"));
chatbotToggler.addEventListener("click", () => document.body.classList.toggle("show-chatbot"));
- Clicking the paper plane icon sends the message.
- Clicking the “X” closes the chatbot.
- Clicking the floating toggle button opens/closes the chat.
Live Preview The Demo Website:
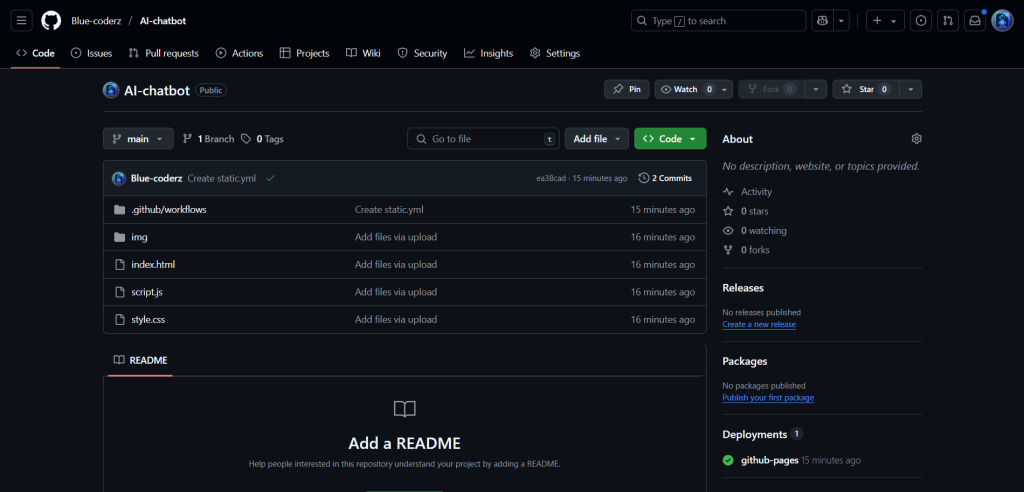
Download complete code :
Git Hub link :
Conclusion :
You just built a fully functional Responsive AI Chatbot Template using pure HTML, CSS, and JavaScript — great job! 🎉
💬 Got stuck somewhere? Drop your questions in the comments.
📲 Want more free tutorials like this? Follow us on Telegram or Instagram.
🔗 Check out more JavaScript UI Projects or Frontend Tools
Tags :
3D Website Effect AI Chatbot Tutorial aspirepages Beginner Chatbot Project Build Chatbot with JavaScript Chatbot with HTML CSS JS Creative Web Design frontend mini project frontend project Gemini API JavaScript Example Gemini Chatbot Integration Google Gemini API How to Create 3D Effects How to Create a Chatbot html card HTML CSS JavaScript Tutorial Interactive Website Design JavaScript Chatbot JavaScript for Websites Web Development Tutorial
Read our previous blog post :