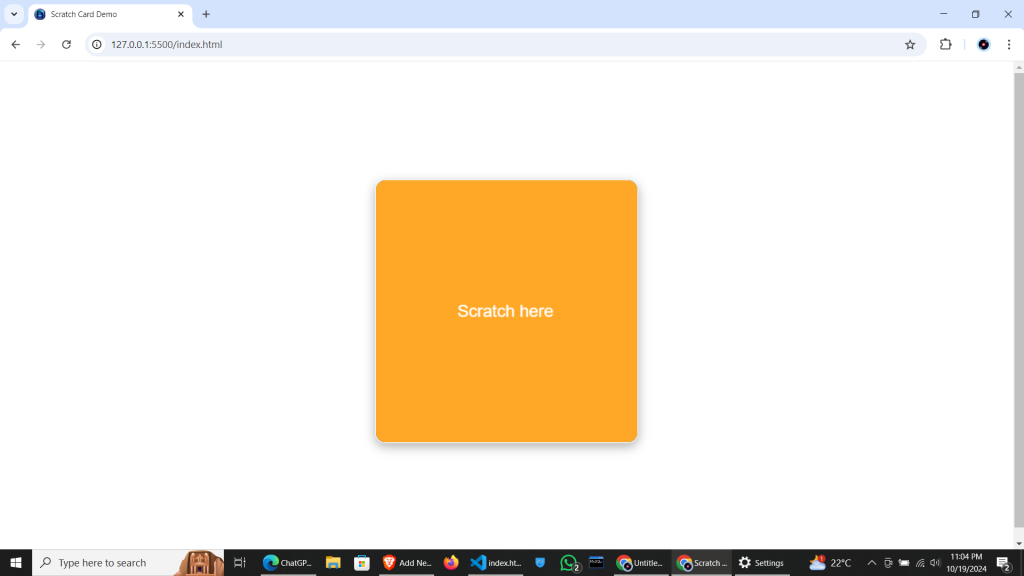
This scratch card UI allows users to “scratch off” an area to reveal a hidden coupon, message, or reward. It’s a fun and engaging feature that adds gamification to your website — increasing user interaction and keeping visitors engaged. Best of all, no frameworks or plugins are required — we’ll be using clean, beginner-friendly HTML, CSS, and JavaScript only.
With just a few lines of scratch card JavaScript, this fun feature can be added to any web project — no advanced coding needed.
In this step-by-step guide, you’ll learn how to create a fully functional scratch card UI using HTML, CSS, and JavaScript in just three simple steps:
You’ll also get access to a free downloadable source code for Scratch Card html css js and a live demo to test it instantly.
[{"id":4359,"link":"https:\/\/aspirepages.in\/javascript-projects-for-beginners-draggable-puzzle\/","name":"javascript-projects-for-beginners-draggable-puzzle","thumbnail":{"url":"https:\/\/aspirepages.in\/wp-content\/uploads\/2025\/07\/JavaScript-Projects-for-Beginners.webp","alt":"JavaScript Projects for Beginners \u2013 Draggable Grid Puzzle Mini Project Tutorial with Source Code"},"title":"JavaScript Projects for Beginners: Build a Draggable Grid Puzzle 2025 (Mini Project Idea)","author":{"name":"narenkumar","link":"https:\/\/aspirepages.in\/author\/narenkumar\/"},"date":"Jul 18, 2025","dateGMT":"2025-07-18 19:31:58","modifiedDate":"2025-07-18 17:36:00","modifiedDateGMT":"0000-00-00 00:00:00","commentCount":"0","commentStatus":"open","categories":{"coma":"<a href=\"https:\/\/aspirepages.in\/category\/coding-projects\/\" rel=\"category tag\">Coding Projects<\/a>, <a href=\"https:\/\/aspirepages.in\/category\/developer-resources\/\" rel=\"category tag\">Developer Resources<\/a>","space":"<a href=\"https:\/\/aspirepages.in\/category\/coding-projects\/\" rel=\"category tag\">Coding Projects<\/a> <a href=\"https:\/\/aspirepages.in\/category\/developer-resources\/\" rel=\"category tag\">Developer Resources<\/a>"},"taxonomies":{"post_tag":"<a href='https:\/\/aspirepages.in\/tag\/beginner-javascript-project\/' rel='post_tag'>Beginner JavaScript Project<\/a><a href='https:\/\/aspirepages.in\/tag\/coding-projects-for-beginners\/' rel='post_tag'>coding projects for beginners<\/a><a href='https:\/\/aspirepages.in\/tag\/drag-and-drop-grid\/' rel='post_tag'>drag and drop grid<\/a><a href='https:\/\/aspirepages.in\/tag\/draggable-elements-js\/' rel='post_tag'>draggable elements js<\/a><a href='https:\/\/aspirepages.in\/tag\/draggable-grid-puzzle\/' rel='post_tag'>draggable grid puzzle<\/a><a href='https:\/\/aspirepages.in\/tag\/frontend-mini-project\/' rel='post_tag'>frontend mini project<\/a><a href='https:\/\/aspirepages.in\/tag\/grid-layout-project\/' rel='post_tag'>grid layout project<\/a><a href='https:\/\/aspirepages.in\/tag\/html-css-js-puzzle\/' rel='post_tag'>html css js puzzle<\/a><a href='https:\/\/aspirepages.in\/tag\/interactive-ui-project\/' rel='post_tag'>interactive ui project<\/a><a href='https:\/\/aspirepages.in\/tag\/javascript-drag-and-drop\/' rel='post_tag'>javascript drag and drop<\/a><a href='https:\/\/aspirepages.in\/tag\/javascript-projects\/' rel='post_tag'>javascript projects<\/a><a href='https:\/\/aspirepages.in\/tag\/learn-javascript-2025\/' rel='post_tag'>learn javascript 2025<\/a><a href='https:\/\/aspirepages.in\/tag\/mini-javascript-projects\/' rel='post_tag'>mini javascript projects<\/a><a href='https:\/\/aspirepages.in\/tag\/puzzle-game-javascript\/' rel='post_tag'>puzzle game javascript<\/a><a href='https:\/\/aspirepages.in\/tag\/web-development-puzzle\/' rel='post_tag'>web development puzzle<\/a>"},"readTime":{"min":9,"sec":58},"status":"publish","excerpt":""},{"id":4346,"link":"https:\/\/aspirepages.in\/website-connection-test-html-js\/","name":"website-connection-test-html-js","thumbnail":{"url":"https:\/\/aspirepages.in\/wp-content\/uploads\/2025\/07\/website-Connection-Test.webp","alt":"responsive website connection test interface using HTML CSS JavaScript"},"title":"Create a Website Connection Test in 3 Minutes Using Pure JavaScript (Free Code)","author":{"name":"narenkumar","link":"https:\/\/aspirepages.in\/author\/narenkumar\/"},"date":"Jul 11, 2025","dateGMT":"2025-07-11 18:30:16","modifiedDate":"2025-07-11 17:21:38","modifiedDateGMT":"0000-00-00 00:00:00","commentCount":"0","commentStatus":"open","categories":{"coma":"<a href=\"https:\/\/aspirepages.in\/category\/coding-projects\/\" rel=\"category tag\">Coding Projects<\/a>, <a href=\"https:\/\/aspirepages.in\/category\/developer-resources\/\" rel=\"category tag\">Developer Resources<\/a>","space":"<a href=\"https:\/\/aspirepages.in\/category\/coding-projects\/\" rel=\"category tag\">Coding Projects<\/a> <a href=\"https:\/\/aspirepages.in\/category\/developer-resources\/\" rel=\"category tag\">Developer Resources<\/a>"},"taxonomies":{"post_tag":"<a href='https:\/\/aspirepages.in\/tag\/aspirepages\/' rel='post_tag'>aspirepages<\/a><a href='https:\/\/aspirepages.in\/tag\/automation-ready-projects\/' rel='post_tag'>automation ready projects<\/a><a href='https:\/\/aspirepages.in\/tag\/beginner-web-tools\/' rel='post_tag'>beginner web tools<\/a><a href='https:\/\/aspirepages.in\/tag\/browser-connectivity-check\/' rel='post_tag'>browser connectivity check<\/a><a href='https:\/\/aspirepages.in\/tag\/check-if-user-is-online\/' rel='post_tag'>check if user is online<\/a><a href='https:\/\/aspirepages.in\/tag\/check-internet-connection-javascript\/' rel='post_tag'>check internet connection javascript<\/a><a href='https:\/\/aspirepages.in\/tag\/connection-test-for-websites\/' rel='post_tag'>connection test for websites<\/a><a href='https:\/\/aspirepages.in\/tag\/css-animation-effects\/' rel='post_tag'>css animation effects<\/a><a href='https:\/\/aspirepages.in\/tag\/custom-alert-box-html\/' rel='post_tag'>custom alert box html<\/a><a href='https:\/\/aspirepages.in\/tag\/detect-network-status\/' rel='post_tag'>detect network status<\/a><a href='https:\/\/aspirepages.in\/tag\/free-source-code\/' rel='post_tag'>Free Source Code<\/a><a href='https:\/\/aspirepages.in\/tag\/front-end-mini-projects\/' rel='post_tag'>front-end mini projects<\/a><a href='https:\/\/aspirepages.in\/tag\/frontend-project\/' rel='post_tag'>frontend project<\/a><a href='https:\/\/aspirepages.in\/tag\/html-css-javascript-mini-project\/' rel='post_tag'>html css javascript mini project<\/a><a href='https:\/\/aspirepages.in\/tag\/html-css-js\/' rel='post_tag'>html css js<\/a><a href='https:\/\/aspirepages.in\/tag\/internet-connection-detector\/' rel='post_tag'>internet connection detector<\/a><a href='https:\/\/aspirepages.in\/tag\/internet-status-checker\/' rel='post_tag'>internet status checker<\/a><a href='https:\/\/aspirepages.in\/tag\/javascript-coding-example\/' rel='post_tag'>javascript coding example<\/a><a href='https:\/\/aspirepages.in\/tag\/javascript-for-beginners\/' rel='post_tag'>javascript for beginners<\/a><a href='https:\/\/aspirepages.in\/tag\/javascript-internet-checker\/' rel='post_tag'>javascript internet checker<\/a><a href='https:\/\/aspirepages.in\/tag\/website-connection-test\/' rel='post_tag'>website connection test<\/a><a href='https:\/\/aspirepages.in\/tag\/website-offline-detector\/' rel='post_tag'>website offline detector<\/a><a href='https:\/\/aspirepages.in\/tag\/website-speed-checker\/' rel='post_tag'>website speed checker<\/a>"},"readTime":{"min":12,"sec":38},"status":"publish","excerpt":""},{"id":4225,"link":"https:\/\/aspirepages.in\/animated-cube-javascript-project-with-source-code\/","name":"animated-cube-javascript-project-with-source-code","thumbnail":{"url":"https:\/\/aspirepages.in\/wp-content\/uploads\/2025\/06\/Copy-of-Planet-Arcadia-6-1.png","alt":"JavaScript Project with Source Code Featuring Animated Cube and Error Fixes"},"title":"Animated Cube JavaScript Project with Source Code: 4 Common JavaScript Mistakes Made & How to Fix Them + Free Code & Line-by-Line Explanation","author":{"name":"narenkumar","link":"https:\/\/aspirepages.in\/author\/narenkumar\/"},"date":"Jun 5, 2025","dateGMT":"2025-06-05 18:55:38","modifiedDate":"2025-06-05 16:29:54","modifiedDateGMT":"0000-00-00 00:00:00","commentCount":"0","commentStatus":"open","categories":{"coma":"<a href=\"https:\/\/aspirepages.in\/category\/coding-projects\/\" rel=\"category tag\">Coding Projects<\/a>","space":"<a href=\"https:\/\/aspirepages.in\/category\/coding-projects\/\" rel=\"category tag\">Coding Projects<\/a>"},"taxonomies":{"post_tag":"<a href='https:\/\/aspirepages.in\/tag\/ai-chatbot-tutorial\/' rel='post_tag'>AI Chatbot Tutorial<\/a><a href='https:\/\/aspirepages.in\/tag\/beginner-chatbot-project\/' rel='post_tag'>Beginner Chatbot Project<\/a><a href='https:\/\/aspirepages.in\/tag\/build-chatbot-with-javascript\/' rel='post_tag'>Build Chatbot with JavaScript<\/a><a href='https:\/\/aspirepages.in\/tag\/chatbot-with-html-css-js\/' rel='post_tag'>Chatbot with HTML CSS JS<\/a><a href='https:\/\/aspirepages.in\/tag\/gemini-api-javascript-example\/' rel='post_tag'>Gemini API JavaScript Example<\/a><a href='https:\/\/aspirepages.in\/tag\/gemini-chatbot-integration\/' rel='post_tag'>Gemini Chatbot Integration<\/a><a href='https:\/\/aspirepages.in\/tag\/google-gemini-api\/' rel='post_tag'>Google Gemini API<\/a><a href='https:\/\/aspirepages.in\/tag\/how-to-create-a-chatbot\/' rel='post_tag'>How to Create a Chatbot<\/a><a href='https:\/\/aspirepages.in\/tag\/javascript-chatbot\/' rel='post_tag'>JavaScript Chatbot<\/a>"},"readTime":{"min":36,"sec":19},"status":"publish","excerpt":""},{"id":4218,"link":"https:\/\/aspirepages.in\/toast-catcher-javascript-project\/","name":"toast-catcher-javascript-project","thumbnail":{"url":"https:\/\/aspirepages.in\/wp-content\/uploads\/2025\/06\/Copy-of-Planet-Arcadia-4-1.png","alt":"JavaScript Project \u2013 Toast Catcher Game with HTML CSS JavaScript for beginners"},"title":"Toast Catcher JavaScript Project for Beginners Using HTML & JavaScript in 3-Step Tutorial with Free Code","author":{"name":"narenkumar","link":"https:\/\/aspirepages.in\/author\/narenkumar\/"},"date":"Jun 3, 2025","dateGMT":"2025-06-03 18:41:47","modifiedDate":"2025-06-03 17:19:42","modifiedDateGMT":"0000-00-00 00:00:00","commentCount":"0","commentStatus":"open","categories":{"coma":"<a href=\"https:\/\/aspirepages.in\/category\/coding-projects\/\" rel=\"category tag\">Coding Projects<\/a>","space":"<a href=\"https:\/\/aspirepages.in\/category\/coding-projects\/\" rel=\"category tag\">Coding Projects<\/a>"},"taxonomies":{"post_tag":"<a href='https:\/\/aspirepages.in\/tag\/ai-chatbot-tutorial\/' rel='post_tag'>AI Chatbot Tutorial<\/a><a href='https:\/\/aspirepages.in\/tag\/beginner-chatbot-project\/' rel='post_tag'>Beginner Chatbot Project<\/a><a href='https:\/\/aspirepages.in\/tag\/build-chatbot-with-javascript\/' rel='post_tag'>Build Chatbot with JavaScript<\/a><a href='https:\/\/aspirepages.in\/tag\/chatbot-with-html-css-js\/' rel='post_tag'>Chatbot with HTML CSS JS<\/a><a href='https:\/\/aspirepages.in\/tag\/gemini-api-javascript-example\/' rel='post_tag'>Gemini API JavaScript Example<\/a><a href='https:\/\/aspirepages.in\/tag\/gemini-chatbot-integration\/' rel='post_tag'>Gemini Chatbot Integration<\/a><a href='https:\/\/aspirepages.in\/tag\/google-gemini-api\/' rel='post_tag'>Google Gemini API<\/a><a href='https:\/\/aspirepages.in\/tag\/how-to-create-a-chatbot\/' rel='post_tag'>How to Create a Chatbot<\/a><a href='https:\/\/aspirepages.in\/tag\/javascript-chatbot\/' rel='post_tag'>JavaScript Chatbot<\/a>"},"readTime":{"min":15,"sec":57},"status":"publish","excerpt":""},{"id":4209,"link":"https:\/\/aspirepages.in\/responsive-ai-chatbot-template\/","name":"responsive-ai-chatbot-template","thumbnail":{"url":"https:\/\/aspirepages.in\/wp-content\/uploads\/2025\/06\/Copy-of-Planet-Arcadia-3-1-1.png","alt":"Responsive AI chatbot UI built with HTML CSS and JavaScript"},"title":"Create a Responsive AI Chatbot Template in Under 3 Minutes (HTML, CSS, JS) + Free Source Code + Setup Guide","author":{"name":"narenkumar","link":"https:\/\/aspirepages.in\/author\/narenkumar\/"},"date":"Jun 2, 2025","dateGMT":"2025-06-02 19:34:10","modifiedDate":"2025-06-02 18:26:51","modifiedDateGMT":"0000-00-00 00:00:00","commentCount":"0","commentStatus":"open","categories":{"coma":"<a href=\"https:\/\/aspirepages.in\/category\/coding-projects\/\" rel=\"category tag\">Coding Projects<\/a>, <a href=\"https:\/\/aspirepages.in\/category\/ai-automation\/\" rel=\"category tag\">AI & Automation<\/a>","space":"<a href=\"https:\/\/aspirepages.in\/category\/coding-projects\/\" rel=\"category tag\">Coding Projects<\/a> <a href=\"https:\/\/aspirepages.in\/category\/ai-automation\/\" rel=\"category tag\">AI & Automation<\/a>"},"taxonomies":{"post_tag":"<a href='https:\/\/aspirepages.in\/tag\/ai-chatbot-tutorial\/' rel='post_tag'>AI Chatbot Tutorial<\/a><a href='https:\/\/aspirepages.in\/tag\/beginner-chatbot-project\/' rel='post_tag'>Beginner Chatbot Project<\/a><a href='https:\/\/aspirepages.in\/tag\/build-chatbot-with-javascript\/' rel='post_tag'>Build Chatbot with JavaScript<\/a><a href='https:\/\/aspirepages.in\/tag\/chatbot-with-html-css-js\/' rel='post_tag'>Chatbot with HTML CSS JS<\/a><a href='https:\/\/aspirepages.in\/tag\/gemini-api-javascript-example\/' rel='post_tag'>Gemini API JavaScript Example<\/a><a href='https:\/\/aspirepages.in\/tag\/gemini-chatbot-integration\/' rel='post_tag'>Gemini Chatbot Integration<\/a><a href='https:\/\/aspirepages.in\/tag\/google-gemini-api\/' rel='post_tag'>Google Gemini API<\/a><a href='https:\/\/aspirepages.in\/tag\/how-to-create-a-chatbot\/' rel='post_tag'>How to Create a Chatbot<\/a><a href='https:\/\/aspirepages.in\/tag\/javascript-chatbot\/' rel='post_tag'>JavaScript Chatbot<\/a>"},"readTime":{"min":18,"sec":29},"status":"publish","excerpt":""},{"id":4200,"link":"https:\/\/aspirepages.in\/file-uploader-with-progress-bar-html-css-js\/","name":"file-uploader-with-progress-bar-html-css-js","thumbnail":{"url":"https:\/\/aspirepages.in\/wp-content\/uploads\/2025\/06\/Copy-of-Planet-Arcadia-2-1.png","alt":"Responsive file uploader with drag and drop and smooth progress bar using HTML CSS JavaScript"},"title":"File Uploader with Smooth Progress Bar or Bar Progression: 7 Unique Features You Won\u2019t Find in Usual Uploaders + Free Code & Easy Tutorial","author":{"name":"narenkumar","link":"https:\/\/aspirepages.in\/author\/narenkumar\/"},"date":"Jun 2, 2025","dateGMT":"2025-06-02 10:04:30","modifiedDate":"2025-06-02 09:46:35","modifiedDateGMT":"2025-06-02 09:46:35","commentCount":"0","commentStatus":"open","categories":{"coma":"<a href=\"https:\/\/aspirepages.in\/category\/coding-projects\/\" rel=\"category tag\">Coding Projects<\/a>","space":"<a href=\"https:\/\/aspirepages.in\/category\/coding-projects\/\" rel=\"category tag\">Coding Projects<\/a>"},"taxonomies":{"post_tag":"<a href='https:\/\/aspirepages.in\/tag\/custom-file-upload-design\/' rel='post_tag'>custom file upload design<\/a><a href='https:\/\/aspirepages.in\/tag\/file-uploader\/' rel='post_tag'>File Uploader<\/a><a href='https:\/\/aspirepages.in\/tag\/free-source-code-uploader\/' rel='post_tag'>free source code uploader<\/a><a href='https:\/\/aspirepages.in\/tag\/frontend-project\/' rel='post_tag'>frontend project<\/a><a href='https:\/\/aspirepages.in\/tag\/html-css-js-uploader\/' rel='post_tag'>html css js uploader<\/a><a href='https:\/\/aspirepages.in\/tag\/html-file-uploader\/' rel='post_tag'>html file uploader<\/a><a href='https:\/\/aspirepages.in\/tag\/html-input-file-design\/' rel='post_tag'>html input file design<\/a><a href='https:\/\/aspirepages.in\/tag\/interactive-upload-form\/' rel='post_tag'>interactive upload form<\/a><a href='https:\/\/aspirepages.in\/tag\/javascript-file-uploader\/' rel='post_tag'>javascript file uploader<\/a><a href='https:\/\/aspirepages.in\/tag\/progress-bar\/' rel='post_tag'>progress bar<\/a><a href='https:\/\/aspirepages.in\/tag\/responsive-uploader\/' rel='post_tag'>responsive uploader<\/a><a href='https:\/\/aspirepages.in\/tag\/smooth-progress-bar\/' rel='post_tag'>smooth progress bar<\/a><a href='https:\/\/aspirepages.in\/tag\/upload-bar-progression\/' rel='post_tag'>upload bar progression<\/a><a href='https:\/\/aspirepages.in\/tag\/upload-progress-animation\/' rel='post_tag'>upload progress animation<\/a><a href='https:\/\/aspirepages.in\/tag\/web-development-tutorial\/' rel='post_tag'>Web Development Tutorial<\/a>"},"readTime":{"min":18,"sec":21},"status":"publish","excerpt":""},{"id":4147,"link":"https:\/\/aspirepages.in\/youtube-clone-with-day-night-toggle-tutorial\/","name":"youtube-clone-with-day-night-toggle-tutorial","thumbnail":{"url":"https:\/\/aspirepages.in\/wp-content\/uploads\/2025\/06\/Copy-of-Planet-Arcadia.png","alt":"responsive YouTube Clone with Day\/Night Toggle built using HTML, CSS, and JavaScript \u2013 Free Source Code Included"},"title":"YouTube Clone with Day\/Night Toggle: Learn & Create in 5 Mins + Free Code","author":{"name":"narenkumar","link":"https:\/\/aspirepages.in\/author\/narenkumar\/"},"date":"Jun 1, 2025","dateGMT":"2025-06-01 18:16:41","modifiedDate":"2025-07-10 08:32:08","modifiedDateGMT":"2025-07-10 08:32:08","commentCount":"0","commentStatus":"open","categories":{"coma":"<a href=\"https:\/\/aspirepages.in\/category\/coding-projects\/\" rel=\"category tag\">Coding Projects<\/a>","space":"<a href=\"https:\/\/aspirepages.in\/category\/coding-projects\/\" rel=\"category tag\">Coding Projects<\/a>"},"taxonomies":{"post_tag":"<a href='https:\/\/aspirepages.in\/tag\/aspire-pages\/' rel='post_tag'>aspire pages<\/a><a href='https:\/\/aspirepages.in\/tag\/beginner-web-projects\/' rel='post_tag'>Beginner Web Projects<\/a><a href='https:\/\/aspirepages.in\/tag\/free-source-code-projects\/' rel='post_tag'>Free Source Code Projects<\/a><a href='https:\/\/aspirepages.in\/tag\/html-css-javascript-tutorial\/' rel='post_tag'>HTML CSS JavaScript Tutorial<\/a><a href='https:\/\/aspirepages.in\/tag\/javascript-toggle-button\/' rel='post_tag'>JavaScript Toggle Button<\/a><a href='https:\/\/aspirepages.in\/tag\/responsive-web-design\/' rel='post_tag'>Responsive Web Design<\/a><a href='https:\/\/aspirepages.in\/tag\/youtube-clone\/' rel='post_tag'>youtube clone<\/a><a href='https:\/\/aspirepages.in\/tag\/youtube-clone-with-day-night\/' rel='post_tag'>YouTube Clone with Day\/Night<\/a>"},"readTime":{"min":30,"sec":5},"status":"publish","excerpt":""},{"id":4135,"link":"https:\/\/aspirepages.in\/responsive-mega-menu-for-navbar\/","name":"responsive-mega-menu-for-navbar","thumbnail":{"url":"https:\/\/aspirepages.in\/wp-content\/uploads\/2025\/05\/Copy-of-Planet-Arcadia-1-1.png","alt":"\u2699\ufe0f Responsive mega menu built using HTML, CSS, and JS for navbar layout"},"title":"Create a Responsive Mega Menu for Navbar in Under 5 Mins: Simple Steps + Copy-and-Use Code Snippets (HTML, CSS, JS | Free Code + Full Tutorial)","author":{"name":"narenkumar","link":"https:\/\/aspirepages.in\/author\/narenkumar\/"},"date":"May 2, 2025","dateGMT":"2025-05-02 17:58:40","modifiedDate":"2025-05-02 17:58:44","modifiedDateGMT":"2025-05-02 17:58:44","commentCount":"0","commentStatus":"open","categories":{"coma":"<a href=\"https:\/\/aspirepages.in\/category\/coding-projects\/\" rel=\"category tag\">Coding Projects<\/a>, <a href=\"https:\/\/aspirepages.in\/category\/developer-resources\/\" rel=\"category tag\">Developer Resources<\/a>","space":"<a href=\"https:\/\/aspirepages.in\/category\/coding-projects\/\" rel=\"category tag\">Coding Projects<\/a> <a href=\"https:\/\/aspirepages.in\/category\/developer-resources\/\" rel=\"category tag\">Developer Resources<\/a>"},"taxonomies":{"post_tag":"<a href='https:\/\/aspirepages.in\/tag\/css-dropdown-menu\/' rel='post_tag'>css dropdown menu<\/a><a href='https:\/\/aspirepages.in\/tag\/free-mega-menu-code\/' rel='post_tag'>free mega menu code<\/a><a href='https:\/\/aspirepages.in\/tag\/frontend-project\/' rel='post_tag'>frontend project<\/a><a href='https:\/\/aspirepages.in\/tag\/html-css-javascript-menu\/' rel='post_tag'>html css javascript menu<\/a><a href='https:\/\/aspirepages.in\/tag\/html-css-js-responsive-menu\/' rel='post_tag'>html css js responsive menu<\/a><a href='https:\/\/aspirepages.in\/tag\/html-css-navbar\/' rel='post_tag'>html css navbar<\/a><a href='https:\/\/aspirepages.in\/tag\/mega-dropdown-menu\/' rel='post_tag'>mega dropdown menu<\/a><a href='https:\/\/aspirepages.in\/tag\/mega-menu\/' rel='post_tag'>mega menu<\/a><a href='https:\/\/aspirepages.in\/tag\/navbar-ui-design\/' rel='post_tag'>navbar ui design<\/a><a href='https:\/\/aspirepages.in\/tag\/navbar-with-dropdown\/' rel='post_tag'>navbar with dropdown<\/a><a href='https:\/\/aspirepages.in\/tag\/navigation-bar-design\/' rel='post_tag'>navigation bar design<\/a><a href='https:\/\/aspirepages.in\/tag\/responsive-mega-menu-tutorial\/' rel='post_tag'>responsive mega menu tutorial<\/a><a href='https:\/\/aspirepages.in\/tag\/responsive-navbar\/' rel='post_tag'>responsive navbar<\/a><a href='https:\/\/aspirepages.in\/tag\/web-development-tutorial\/' rel='post_tag'>Web Development Tutorial<\/a><a href='https:\/\/aspirepages.in\/tag\/web-navigation-ui\/' rel='post_tag'>web navigation ui<\/a>"},"readTime":{"min":66,"sec":10},"status":"publish","excerpt":""},{"id":4120,"link":"https:\/\/aspirepages.in\/smooth-image-slider-tutorial\/","name":"smooth-image-slider-tutorial","thumbnail":{"url":"https:\/\/aspirepages.in\/wp-content\/uploads\/2025\/03\/smooth-slider.png","alt":"A responsive split-screen image slider with smooth mouse interaction, built using HTML, CSS, and JavaScript\u2014perfect for modern web design."},"title":"How to Create a Smooth Image Slider with Mouse Interaction in Less Than 5 Steps Using Pure HTML, CSS, and JavaScript (Free Code + Full Tutorial)","author":{"name":"narenkumar","link":"https:\/\/aspirepages.in\/author\/narenkumar\/"},"date":"Mar 18, 2025","dateGMT":"2025-03-18 14:44:45","modifiedDate":"2025-07-10 08:35:17","modifiedDateGMT":"2025-07-10 08:35:17","commentCount":"1","commentStatus":"open","categories":{"coma":"<a href=\"https:\/\/aspirepages.in\/category\/coding-projects\/\" rel=\"category tag\">Coding Projects<\/a>, <a href=\"https:\/\/aspirepages.in\/category\/developer-resources\/\" rel=\"category tag\">Developer Resources<\/a>","space":"<a href=\"https:\/\/aspirepages.in\/category\/coding-projects\/\" rel=\"category tag\">Coding Projects<\/a> <a href=\"https:\/\/aspirepages.in\/category\/developer-resources\/\" rel=\"category tag\">Developer Resources<\/a>"},"taxonomies":{"post_tag":"<a href='https:\/\/aspirepages.in\/tag\/aspirepages\/' rel='post_tag'>aspirepages<\/a><a href='https:\/\/aspirepages.in\/tag\/creative-web-design\/' rel='post_tag'>Creative Web Design<\/a><a href='https:\/\/aspirepages.in\/tag\/frontend-project\/' rel='post_tag'>frontend project<\/a><a href='https:\/\/aspirepages.in\/tag\/html-card\/' rel='post_tag'>html card<\/a><a href='https:\/\/aspirepages.in\/tag\/html-css-javascript-tutorial\/' rel='post_tag'>HTML CSS JavaScript Tutorial<\/a><a href='https:\/\/aspirepages.in\/tag\/htmlcssjavascript\/' rel='post_tag'>HTMLCSSJavaScript<\/a><a href='https:\/\/aspirepages.in\/tag\/image-slider\/' rel='post_tag'>image slider<\/a><a href='https:\/\/aspirepages.in\/tag\/interactive-website-design\/' rel='post_tag'>Interactive Website Design<\/a><a href='https:\/\/aspirepages.in\/tag\/javascript-for-websites\/' rel='post_tag'>JavaScript for Websites<\/a><a href='https:\/\/aspirepages.in\/tag\/mouse-interaction-effect\/' rel='post_tag'>mouse interaction effect<\/a><a href='https:\/\/aspirepages.in\/tag\/responsivecardslider\/' rel='post_tag'>ResponsiveCardSlider<\/a><a href='https:\/\/aspirepages.in\/tag\/smooth-animation\/' rel='post_tag'>smooth animation<\/a><a href='https:\/\/aspirepages.in\/tag\/split-screen-slider\/' rel='post_tag'>split-screen slider<\/a>"},"readTime":{"min":6,"sec":37},"status":"publish","excerpt":""},{"id":4114,"link":"https:\/\/aspirepages.in\/responsive-card-slider-html-css-javascript\/","name":"responsive-card-slider-html-css-javascript","thumbnail":{"url":"https:\/\/aspirepages.in\/wp-content\/uploads\/2025\/03\/Responsive-Card-Slider.png","alt":"Responsive card slider created with HTML, CSS, and JavaScript, featuring smooth scrolling and touch-friendly controls for modern web design."},"title":"Create a Responsive Card Slider in Just 3 Simple Steps Using Pure HTML, CSS, and JavaScript (Free Source Code + Line-by-Line Explanation)","author":{"name":"narenkumar","link":"https:\/\/aspirepages.in\/author\/narenkumar\/"},"date":"Mar 16, 2025","dateGMT":"2025-03-16 18:11:09","modifiedDate":"2025-07-10 08:36:13","modifiedDateGMT":"2025-07-10 08:36:13","commentCount":"0","commentStatus":"open","categories":{"coma":"<a href=\"https:\/\/aspirepages.in\/category\/coding-projects\/\" rel=\"category tag\">Coding Projects<\/a>","space":"<a href=\"https:\/\/aspirepages.in\/category\/coding-projects\/\" rel=\"category tag\">Coding Projects<\/a>"},"taxonomies":{"post_tag":"<a href='https:\/\/aspirepages.in\/tag\/3d-website-effect\/' rel='post_tag'>3D Website Effect<\/a><a href='https:\/\/aspirepages.in\/tag\/aspirepages\/' rel='post_tag'>aspirepages<\/a><a href='https:\/\/aspirepages.in\/tag\/creative-web-design\/' rel='post_tag'>Creative Web Design<\/a><a href='https:\/\/aspirepages.in\/tag\/how-to-create-3d-effects\/' rel='post_tag'>How to Create 3D Effects<\/a><a href='https:\/\/aspirepages.in\/tag\/html-card\/' rel='post_tag'>html card<\/a><a href='https:\/\/aspirepages.in\/tag\/html-css-javascript-tutorial\/' rel='post_tag'>HTML CSS JavaScript Tutorial<\/a><a href='https:\/\/aspirepages.in\/tag\/htmlcssjavascript\/' rel='post_tag'>HTMLCSSJavaScript<\/a><a href='https:\/\/aspirepages.in\/tag\/interactive-website-design\/' rel='post_tag'>Interactive Website Design<\/a><a href='https:\/\/aspirepages.in\/tag\/javascript-for-websites\/' rel='post_tag'>JavaScript for Websites<\/a><a href='https:\/\/aspirepages.in\/tag\/responsivecardslider\/' rel='post_tag'>ResponsiveCardSlider<\/a><a href='https:\/\/aspirepages.in\/tag\/web-development-tutorial\/' rel='post_tag'>Web Development Tutorial<\/a>"},"readTime":{"min":9,"sec":34},"status":"publish","excerpt":""},{"id":4098,"link":"https:\/\/aspirepages.in\/mern-stack-data-flow-vite-react-nodejs-mongodb\/","name":"mern-stack-data-flow-vite-react-nodejs-mongodb","thumbnail":{"url":"https:\/\/aspirepages.in\/wp-content\/uploads\/2025\/03\/mernstack.png","alt":"MERN Stack Data Flow Explained (2025) \u2013 Connecting Vite React, Node.js, Express & MongoDB via REST API"},"title":"MERN Stack Data Flow Explained (2025): Essential Steps for MERN Stack Developers to Link Vite React, Node.js, Express & MongoDB Using REST API (Free Code & Line-by-Line Explanation)","author":{"name":"narenkumar","link":"https:\/\/aspirepages.in\/author\/narenkumar\/"},"date":"Mar 14, 2025","dateGMT":"2025-03-14 17:32:40","modifiedDate":"2025-07-10 08:37:13","modifiedDateGMT":"2025-07-10 08:37:13","commentCount":"0","commentStatus":"open","categories":{"coma":"<a href=\"https:\/\/aspirepages.in\/category\/developer-resources\/\" rel=\"category tag\">Developer Resources<\/a>, <a href=\"https:\/\/aspirepages.in\/category\/coding-projects\/\" rel=\"category tag\">Coding Projects<\/a>, <a href=\"https:\/\/aspirepages.in\/category\/learning-roadmaps\/\" rel=\"category tag\">Learning Roadmaps<\/a>","space":"<a href=\"https:\/\/aspirepages.in\/category\/developer-resources\/\" rel=\"category tag\">Developer Resources<\/a> <a href=\"https:\/\/aspirepages.in\/category\/coding-projects\/\" rel=\"category tag\">Coding Projects<\/a> <a href=\"https:\/\/aspirepages.in\/category\/learning-roadmaps\/\" rel=\"category tag\">Learning Roadmaps<\/a>"},"taxonomies":{"post_tag":"<a href='https:\/\/aspirepages.in\/tag\/frontend-backend-data-exchange\/' rel='post_tag'>Frontend Backend Data Exchange<\/a><a href='https:\/\/aspirepages.in\/tag\/mern-stack\/' rel='post_tag'>MERN stack<\/a><a href='https:\/\/aspirepages.in\/tag\/mern-stack-frontend-backend-communication\/' rel='post_tag'>MERN Stack Frontend Backend Communication<\/a><a href='https:\/\/aspirepages.in\/tag\/rest-api\/' rel='post_tag'>Rest API<\/a><a href='https:\/\/aspirepages.in\/tag\/vite-react\/' rel='post_tag'>Vite React<\/a>"},"readTime":{"min":11,"sec":36},"status":"publish","excerpt":""},{"id":4078,"link":"https:\/\/aspirepages.in\/3d-html-card-animation-guide\/","name":"3d-html-card-animation-guide","thumbnail":{"url":"https:\/\/aspirepages.in\/wp-content\/uploads\/2024\/11\/pixelcut-export-3.png","alt":"Ghost card animation with HTML and CSS displayed on a clean, modern website background"},"title":"HTML Card Animation: Create a Ghost Card Effect for Your Website in 3 Steps: Free Downloadable Source File and Step-by-Step Explanation :","author":{"name":"narenkumar","link":"https:\/\/aspirepages.in\/author\/narenkumar\/"},"date":"Nov 24, 2024","dateGMT":"2024-11-24 18:37:06","modifiedDate":"2025-07-10 08:38:29","modifiedDateGMT":"2025-07-10 08:38:29","commentCount":"0","commentStatus":"open","categories":{"coma":"<a href=\"https:\/\/aspirepages.in\/category\/coding-projects\/\" rel=\"category tag\">Coding Projects<\/a>, <a href=\"https:\/\/aspirepages.in\/category\/developer-resources\/\" rel=\"category tag\">Developer Resources<\/a>","space":"<a href=\"https:\/\/aspirepages.in\/category\/coding-projects\/\" rel=\"category tag\">Coding Projects<\/a> <a href=\"https:\/\/aspirepages.in\/category\/developer-resources\/\" rel=\"category tag\">Developer Resources<\/a>"},"taxonomies":{"post_tag":"<a href='https:\/\/aspirepages.in\/tag\/3d-website-effect\/' rel='post_tag'>3D Website Effect<\/a><a href='https:\/\/aspirepages.in\/tag\/creative-web-design\/' rel='post_tag'>Creative Web Design<\/a><a href='https:\/\/aspirepages.in\/tag\/how-to-create-3d-effects\/' rel='post_tag'>How to Create 3D Effects<\/a><a href='https:\/\/aspirepages.in\/tag\/html-card\/' rel='post_tag'>html card<\/a><a href='https:\/\/aspirepages.in\/tag\/html-css-javascript-tutorial\/' rel='post_tag'>HTML CSS JavaScript Tutorial<\/a><a href='https:\/\/aspirepages.in\/tag\/interactive-website-design\/' rel='post_tag'>Interactive Website Design<\/a><a href='https:\/\/aspirepages.in\/tag\/javascript-for-websites\/' rel='post_tag'>JavaScript for Websites<\/a><a href='https:\/\/aspirepages.in\/tag\/web-development-tutorial\/' rel='post_tag'>Web Development Tutorial<\/a>"},"readTime":{"min":15,"sec":13},"status":"publish","excerpt":""}] 


Howdy! I could have sworn I’ve been to this site
before but after reading through sme of the post I realized it’s new to me.
Anyhow, I’m definitely happy I found it and I’ll be bookmarkiing